1 significant improvement to Linux is the partition of the disk. Users in these days can simply use the GUI interface or software such as G-Part to partition instead of using commands.
However for me, being a fan of Linux OS, it will be somehow a feeling of dissatisfaction without trying to partition using Linux commands. Today i will blog how i partition using the hard disk in Linux without using GUI.
To save time and to print some screens on how it works, i will use DLX OS using the Bochs Virtual Environment. Below are the steps of how i install DLX into Bochs Env using the Windows system. If you happened to read this post and you like to try partitioning using Linux, simply skip the Bochs part:)
如今有这么多的改善作出贡献的Linux,更十多年前比起来,真的是比较容易多了。
一个显着改善Linux,就是磁盘分区。
在这个世纪里,用户可以简单地使用GUI界面或如G-Part软件进行分区,而不是使用Unix/Linux的命令。
然而,对于我来说,Linux操作系统的风扇喜爱者,不尝试使用Unix/Linux的命令分区磁盘,将是某种的不满情绪.
今天我将博客我是如何分区硬盘,不使用GUI界面在Linux。
为了节省时间,并打印它是如何工作的一些画面,我将用DLX的操作系统使用Bochs的虚拟环境。
下面是我的步骤,如何使用Windows系统安装 DLX在 Bochs的环境中。
如果你碰巧看到这篇文章,你想尝试使用Linux分区,请跳过Bochs这一部分
First i create a disk image in Bosch as shown below:
博世创建一个磁盘映像:
Now i will copy the DLX image into the Bochs directory.
复制DLX形象到Bochs的目录中
The boch.bxrc file.
boch.bxrc文件。
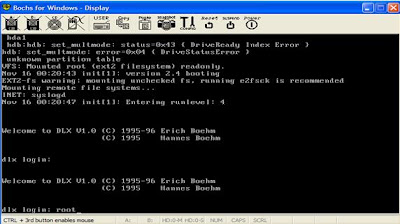
Now go into the dxlinux and click on the run.bat file to start the program. I will be looking at the screen as shown below:
点击进入dxlinux和澳run.bat文件.
Log in as root:
以root身份登录:
Start partioning the drive.
开始磁盘分区
开始磁盘分区
Type fdisk –l to see the status of the disk:
Type fdisk /dev/hdb to start portioning
The steps below are used to partition in sequence.40M means 40MB
下面的步骤是用来磁盘分区
- Select ‘p’ to partition.
- Enter 1 to partion hdb1
- Enter 40M for memory
- Enter ‘n’ to partition
- Enter ‘p’
- Enter 2 to partition hdb2
- Enter 40M for memory
- Repeat the steps of 1 to 7, however at step 2, enter 3 and 4 to partition each HD respectively as well as hdb3 for 10M and hdb4 for 10M
- In total based on the steps just listed, i'm creating 4 partitions. Normally we create partitions for root partition, home partition and swap partition. I prefer to create another 1 more partition to store important documents or files.
- 在对刚刚上市的步骤的基础总额,我创建4个分区。
Enter or type 'w' to write the partition into the system. It should return: 'Partition table has been altered'
在设置了必要的分区,我们需要编写/注册分区。
Now check the partition of my disk using fdisk -l. It should list 4 partitions in the disk.
检查我的磁盘分区使用fdisk- 1
Lets create the file systems for each individual partitions by typing the following commands:
创建文件系统:
1) mke2fs /dev/hdb1
2) mke2fs /dev/hdb2
3) mke2fs /dev/hdb3
4) mke2fs /dev/hdb4
Below is the confirmation of creating the file systems:
Now i will be creating directories and mount each directory to a partition. Its like mounting a thumbdrive into Linux. To mount, we need to create a directory so that it can connect to the thumbdrive or partition and we can access the data in the partition by accessing the directory.
Create the 4 directories first (any name i want)
创建目录和每个目录挂载到分区。:
创建目录和每个目录挂载到分区。:
- mkdir /web
- mkdir /usr/local
- mkdir /usr/local/spare
- mkdir /home
Mounting the partitions to the respective directories.
- Mount –a /dev/hdb1 /home
- Mount –a /dev/hdb2 /usr/local
- Mount –a /dev/hdb3 /usr/local/spare
- Mount –a /dev/hdb4 /usr/home
Type df-k to see the mounted directories:
This should end how to partition and mounting of file systems.
这应该结束如何分区和文件系统的安装。


No comments:
Post a Comment